Operator Terminal
The Operator Terminal is the screen operators see at their workstation. It runs on tablets and large touchscreens on the shop floor. Everything is designed for touch — large tap targets, no tiny buttons, no keyboard needed.
Selecting Your Cell
Section titled “Selecting Your Cell”When you open the terminal, pick your cell (workstation) from the cell selector at the top. This filters everything to show only work assigned to your cell. If you work at multiple cells, switch between them with one tap.
The Three Queues
Section titled “The Three Queues”Your work is split into three sections, top to bottom. The split follows the routing of each part:
flowchart TD
  O["Operation at your cell"] -->|"in progress or on hold"| P["In Process"]
  O -->|"not started"| R{"Every earlier operation<br/>on the part completed?"}
  R -->|yes| B["In Buffer"]
  R -->|no| E["Expected"]
  E -->|"Sequential release on"| X["Start disabled"]
  E -->|"Sequential release off"| S["Start allowed"]
In Process
Section titled “In Process”What you are working on right now. These operations are active — the timer is running. This section is usually one or two items. If something is here, that is your focus.
In Buffer
Section titled “In Buffer”What is next. Every earlier operation on the part is completed, so the part can be picked up at your cell. Work first in, first out: when you finish your current work, take the next item from the buffer.
Expected
Section titled “Expected”What is on its way. An earlier operation on the part is still open at another cell. The Cell column shows where the part is right now. By default you can still start an Expected operation, for example to prepare the workplace on project work. An admin can switch on Sequential release in Organization settings; then Start is disabled until the previous operation is completed, and the API and MCP server follow the same rule.
Each section shows totals at the bottom: total time and total pieces. Time reads in plain units — 45m, 1h 20m, 2h — never minutes mislabelled as hours.
Next-Cell Capacity Signal
Section titled “Next-Cell Capacity Signal”Every operation in your queue shows a cell signal like Laser → Zetten: GO or Zetten → Lassen: PAUSE.
This tells you two things:
- Your cell → Next cell — where the part goes after you finish
- GO or PAUSE — whether the next cell has capacity to accept work
If the signal says GO, the next cell is ready. Work on it. If it says PAUSE, the next cell is full. Work on other items with a GO signal first. This keeps parts flowing instead of piling up between stations.
Backlog Status
Section titled “Backlog Status”The backlog column tells you how urgent each operation is:
| Status | Meaning |
|---|---|
| Overdue | Overdue. Should have been done already. |
| Today | Due today. Finish before end of shift. |
| Soon | Due soon. Coming up in the next few days. |
Combined with the next-cell signal, this helps you decide what to pick up next: overdue GO items first, then today’s GO items, then the rest.
Bullet Cards
Section titled “Bullet Cards”A Bullet Card is the one priority signal in Eryxon Flow. Operations carrying one stand out with a red border and always sort to the top of each section. If you see red, that job jumps the queue — work it even if the next cell shows PAUSE.
Status Bar
Section titled “Status Bar”The bar at the bottom of the screen shows your current state:
- Your name — confirms who is logged in
- Current operation — what you are working on
- Live timer — how long you have been on this operation
- Operator state — Active or Idle
The state updates automatically. When you start an operation, it switches to Active. When nothing is in process, it shows Idle.
Detail Panel
Section titled “Detail Panel”Tap any operation to open the detail panel. It is built around one idea: a calm header that tells you what you are holding, then everything else tucked behind tabs so the screen never feels cluttered. The panel fills the right side on a workstation and the whole screen on a phone.
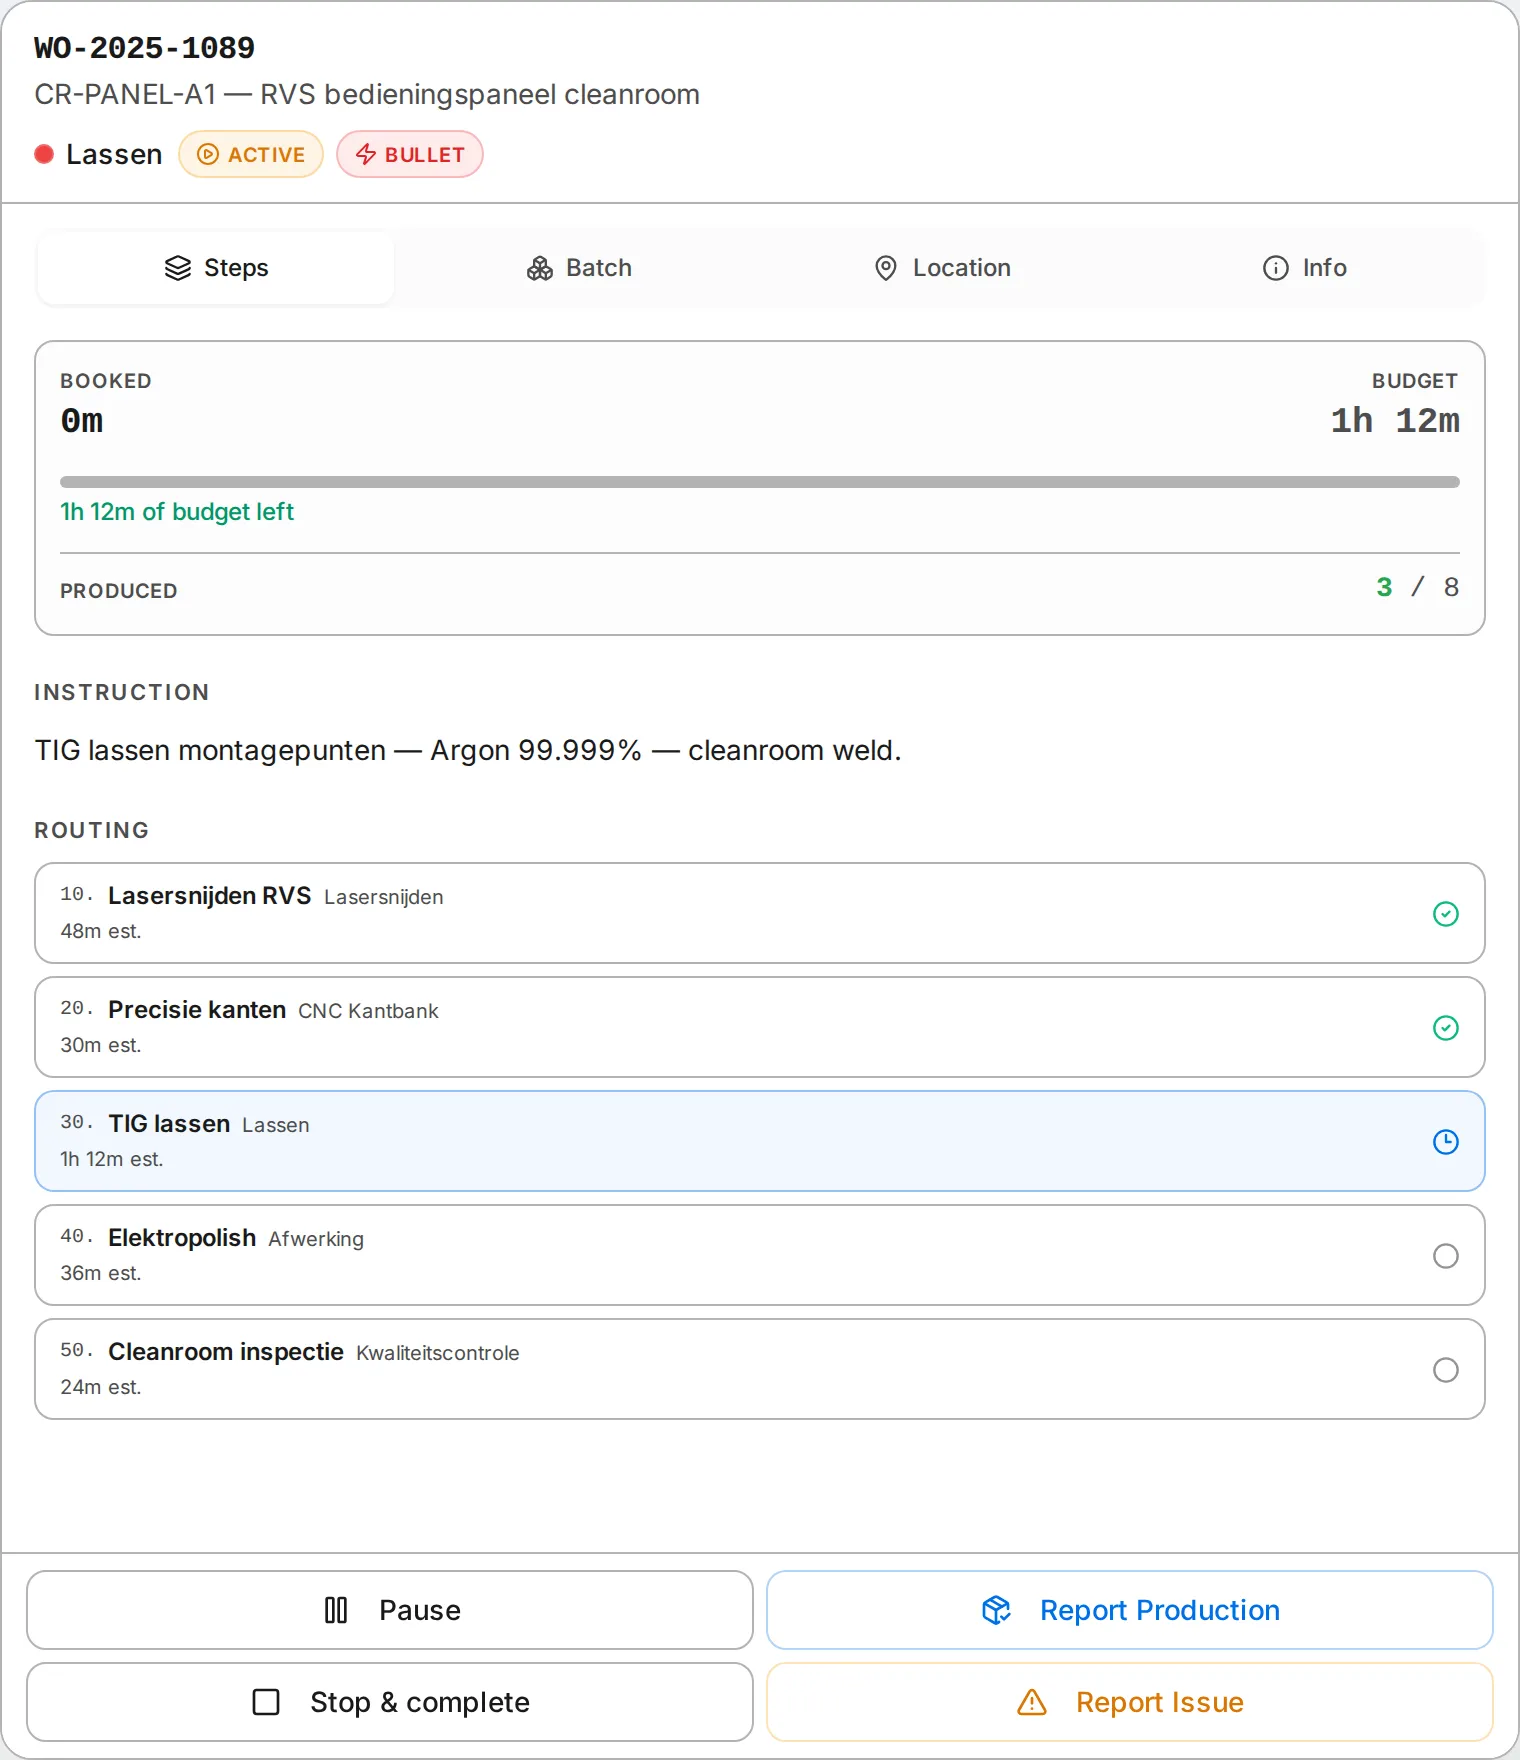
At the top, the header shows the job number, the part, the cell you are at, and two chips: whether the operation is active, and a Bullet chip if it carries a Bullet Card and jumps the queue. Each fact appears once; nothing is repeated.
Below the header, tabs hold the detail (only the ones with something to show appear):
- Steps — opens with time booked vs budget for this operation (an over/under chip and a progress bar) and the operators who worked on it, with a live dot for anyone running the clock now. Below that, the instruction for this cell under a clear label, a step-by-step checklist that appears while you are clocked on, and the full production route with completed and remaining steps highlighted. Your current step is called out. Times read in plain units (
1h 12m, not72h). - Batch — when the part runs as part of a nest or batch, this shows the batch number, type, status, and how many operations move together. Hidden when the part is not batched. See Batch & nesting.
- Location — where the part physically is and where it is heading next. Shown only when location tracking is on. See Location tracking.
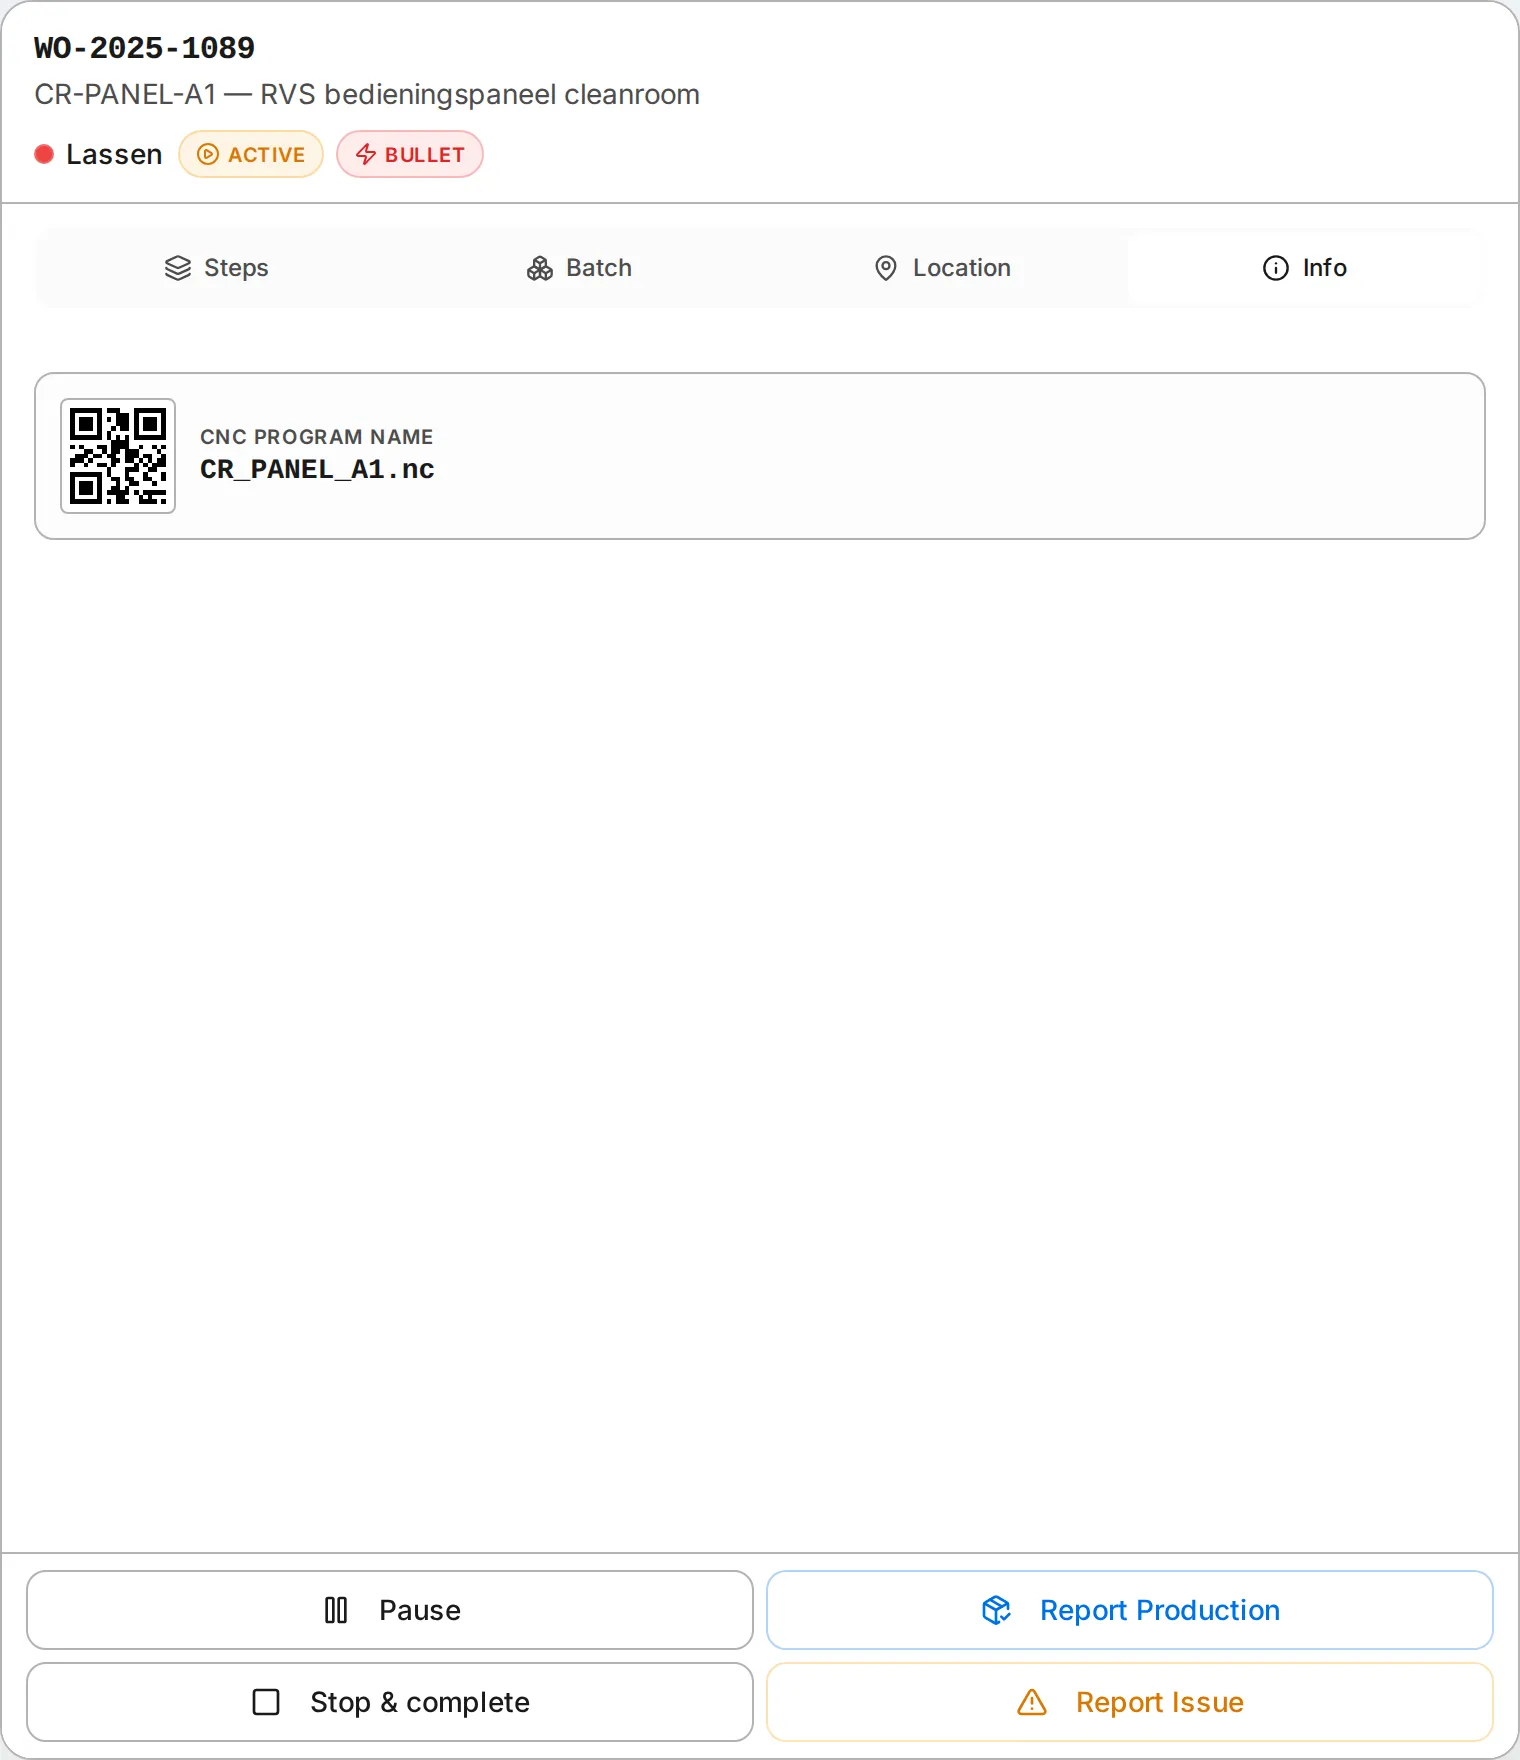
- Info — required tools and resources, assembly dependencies, and the CNC program QR code.
When the part has a 3D model or a drawing, 3D and PDF tabs appear too — they load only when you open them, so the panel stays fast. Tap Expand for a full-screen view.
The action bar is pinned to the bottom in thumb reach: Start / Pause, Report production, Mark complete, and Report issue. The order is explicit: report the completed quantity, then mark the operation complete. When the reported quantity reaches the target, Report & complete does both in one tap. Mark complete remains available for short operations that do not need a timer. When a timer is running, Stop & complete closes the timer and operation in one transaction.
Only one individual operation can run per operator. If you scan or start another operation while a timer is running, the terminal names the current and next operation and asks you to confirm the switch. Confirming stops the old timer and starts the new one in one transaction, so a rejected start cannot leave the old operation stopped.
On a phone
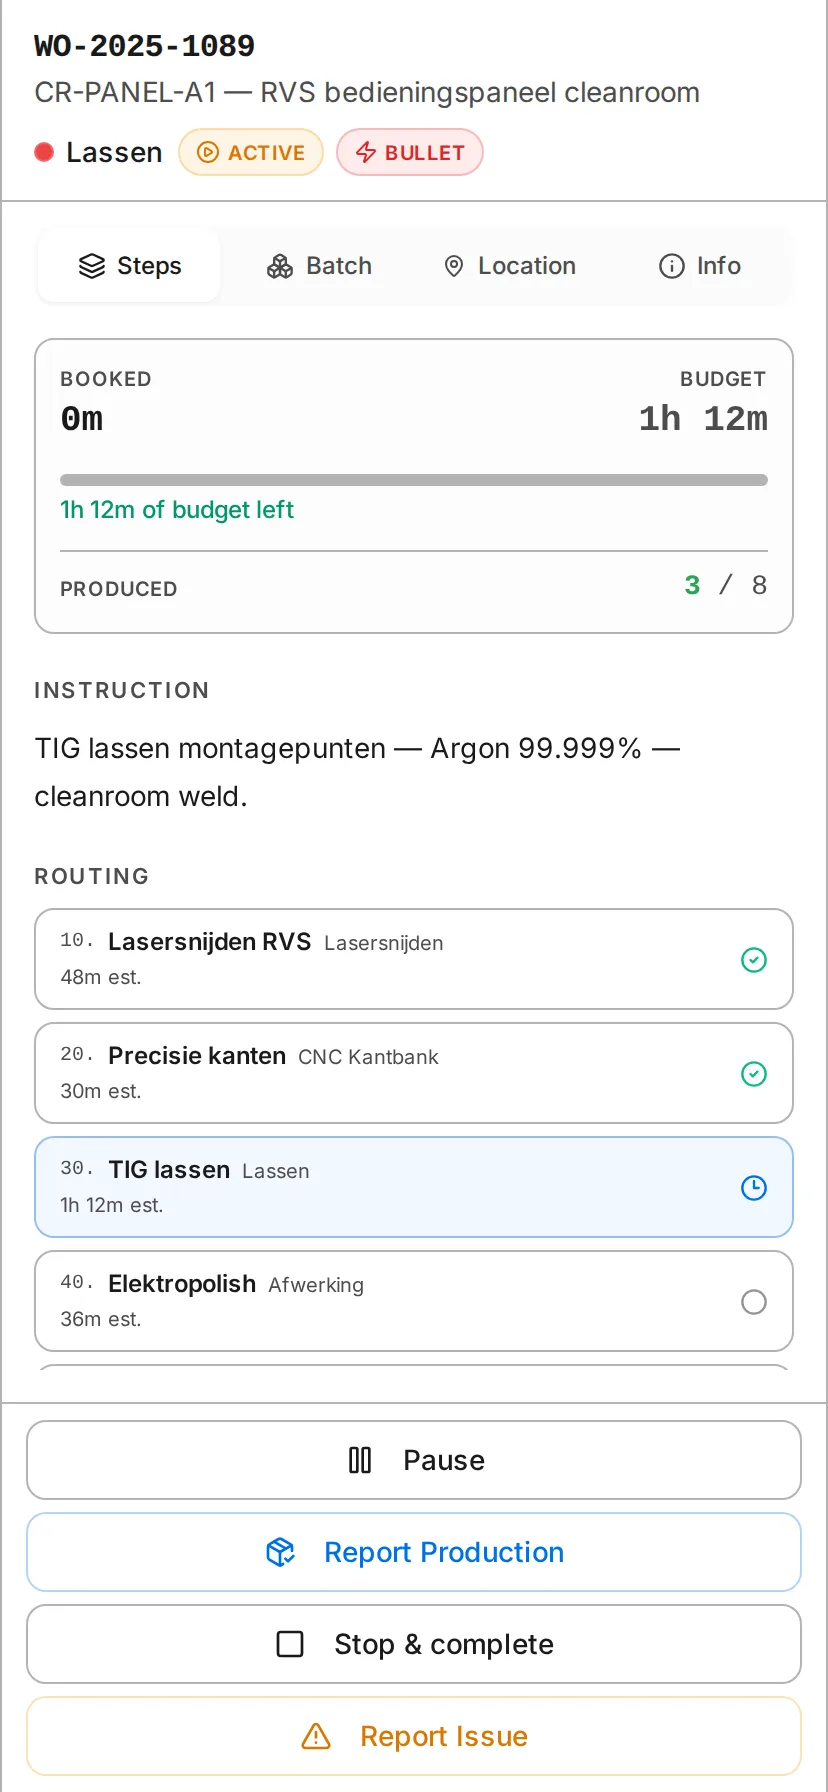
Section titled “On a phone”The same panel reflows to a single column on a phone — full-width tabs, stacked actions, large tap targets — so the floor view is just as usable on a handheld as on a wall-mounted terminal.
Close the panel by tapping outside it, pressing the X, or — on a phone — using Back.
Light and dark
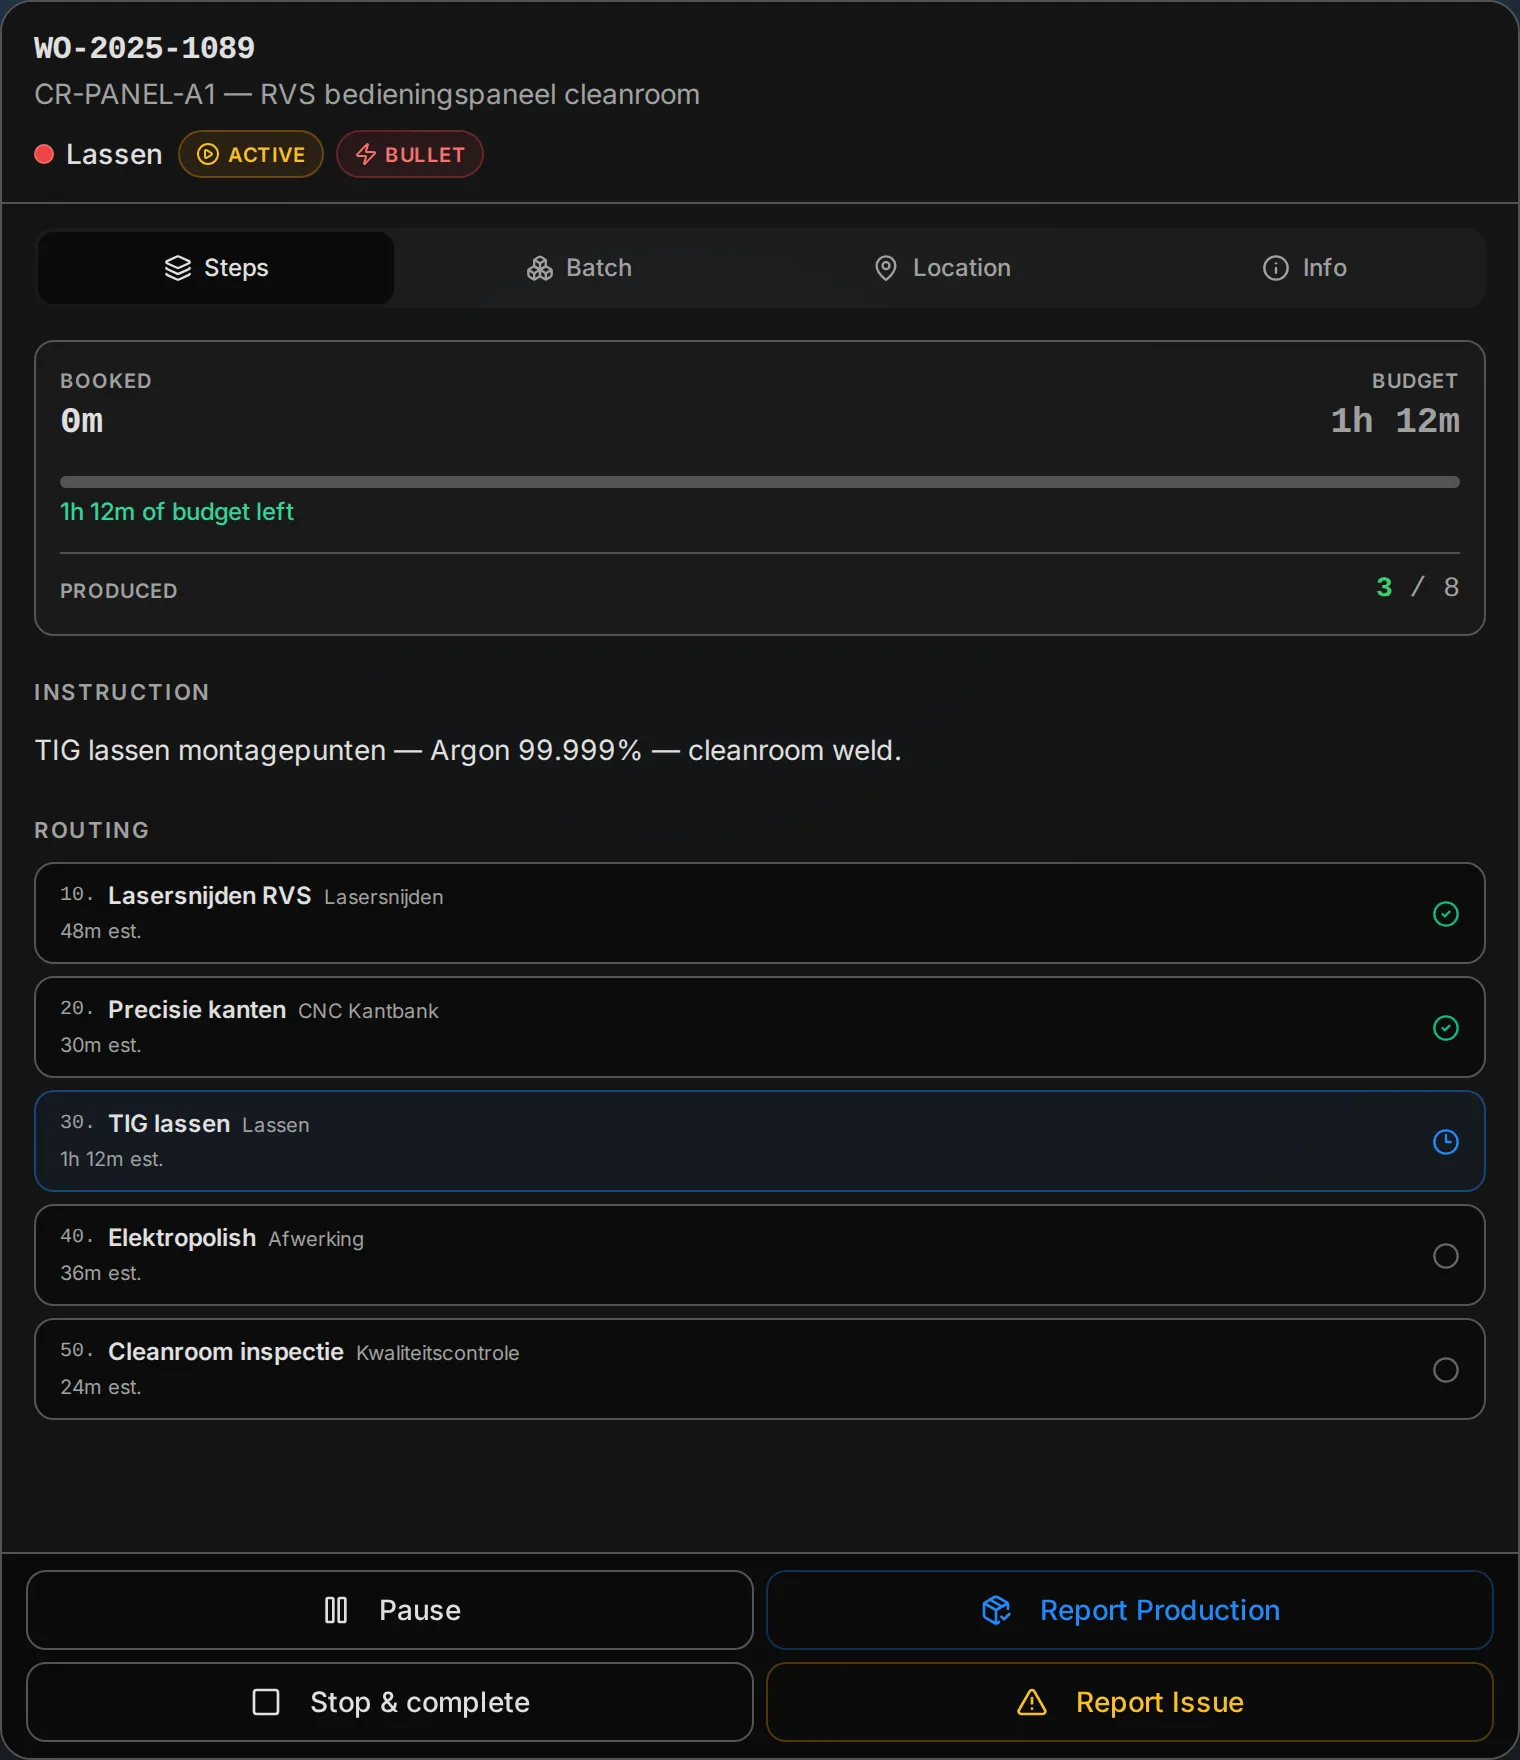
Section titled “Light and dark”The terminal follows the device theme, so a workstation in a bright hall and a tablet in a dim cell are both easy to read.
Tips for Daily Use
Section titled “Tips for Daily Use”- Start your shift by checking the In Buffer section. That is your immediate work.
- Watch the next-cell signals. Working on GO items keeps the whole shop moving.
- If everything shows PAUSE, flag your foreman — it usually means a downstream bottleneck.
- Use the detail panel to double-check dimensions or instructions before starting a cut.
- Bullet Cards (red border) always come first, regardless of other signals.